

Fixing Lever for Xerox WorkCentre WC5855 – Fuser Pressure Release Lever Replacement for 5800 Series Printers
, by Narendra Vaid, 12 min reading time
, by Narendra Vaid, 12 min reading time
The fuser in Xerox WorkCentre 5855 printers uses heat and pressure to permanently bond toner to paper, ensuring high-quality, durable prints. Key components like the heat roller, pressure roller, and fixing lever are essential for its proper function and maintenance.
This article provides a comprehensive guide to understanding and addressing issues related to the WC5855 fixing lever, a critical component within the Xerox copier printer fuser. We will delve into the fuser's function, the lever's specific role, common problems encountered, and potential solutions, including replacement and repair strategies. This information is essential for maintenance professionals and users seeking to ensure optimal printer performance.

The fuser is a vital assembly in Xerox printers, playing a crucial role in the printing process. Specifically in the Xerox WorkCentre 5855 series, the fuser uses heat and pressure to permanently bond toner to the paper. Without a properly functioning fuser, the toner would simply smear off the page. Understanding the different components of the fuser, such as the heat roller, pressure roller, and the fixing lever, is the first step toward effective maintenance and repair. The WorkCentre 5855 fuser is responsible for ensuring that the toner properly adheres to the paper, producing high-quality, durable prints. Therefore, maintaining its functionality is critical.
In Xerox printers, the fuser is the unit responsible for permanently bonding the toner to the paper. This process involves applying heat and pressure to fuse the toner particles into the fibers of the paper, creating a durable image. The fuser assembly typically consists of a heat roller, which is heated to a specific temperature, and a pressure roller, which presses the paper against the heat roller. As the paper passes through the fuser, the toner melts and becomes embedded in the paper. Malfunctions in the fuser can lead to various print quality issues, such as smudging, toner not fixing correctly, or paper jams. Regular maintenance and timely replacement of fuser components are essential for ensuring optimal print quality and preventing equipment downtime. The thermal fuse and thermostat are also key parts, preventing overheating of the fuser.
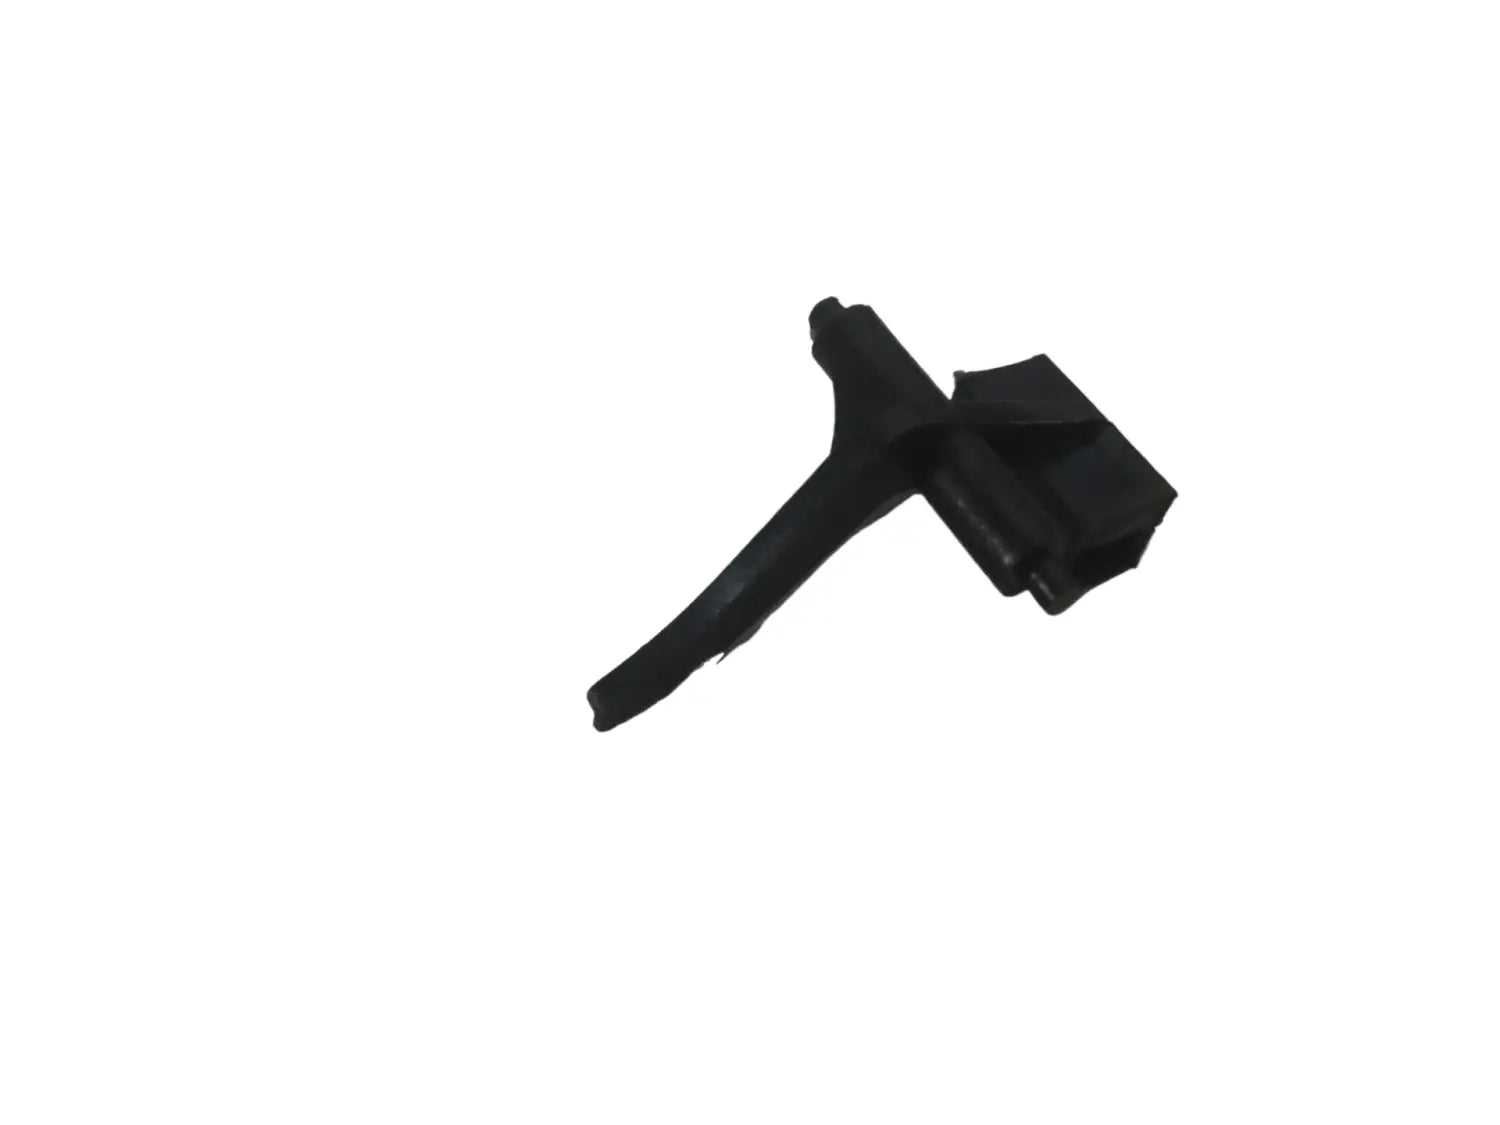
The fixing lever in the fuser module plays a critical role in the release mechanism. This lever, specifically the WC5855 fixing lever, is responsible for applying the correct pressure to the fuser rollers. Without the proper pressure, the toner may not adhere correctly, causing print quality issues. The lever is essential for releasing the paper smoothly from the fuser assembly, preventing jams and ensuring consistent performance. The fixing lever helps to guide the paper through the fuser module and to secure the paper for proper toner adhesion. A broken or damaged fixing lever can lead to significant printing problems and may require replacement to fix the issue and ensure the printer works correctly. It assists in maintaining the correct tension and pressure, which is crucial for effective fusing.
Common issues related to the WC5855 fuser often involve problems with the fixing lever, leading to poor print quality or paper jams. One common symptom is toner smearing on the page, indicating that the toner is not being properly fused due to incorrect pressure or heat. Another issue can be paper becoming stuck in the fuser, often caused by a faulty or broken fixing lever not releasing the paper correctly. Over time, the fuser rollers can wear out, and the lever can break or become dislodged due to normal wear and tear. Routine maintenance, including inspecting the fuser and replacing worn parts, is essential to prevent these issues. If these problems arise, it's important to consult fuser module rebuild instructions or consider replacing the fuser unit to ensure the printer continues to function efficiently. The lever is essential for the functioning of the 5855 series fusers.
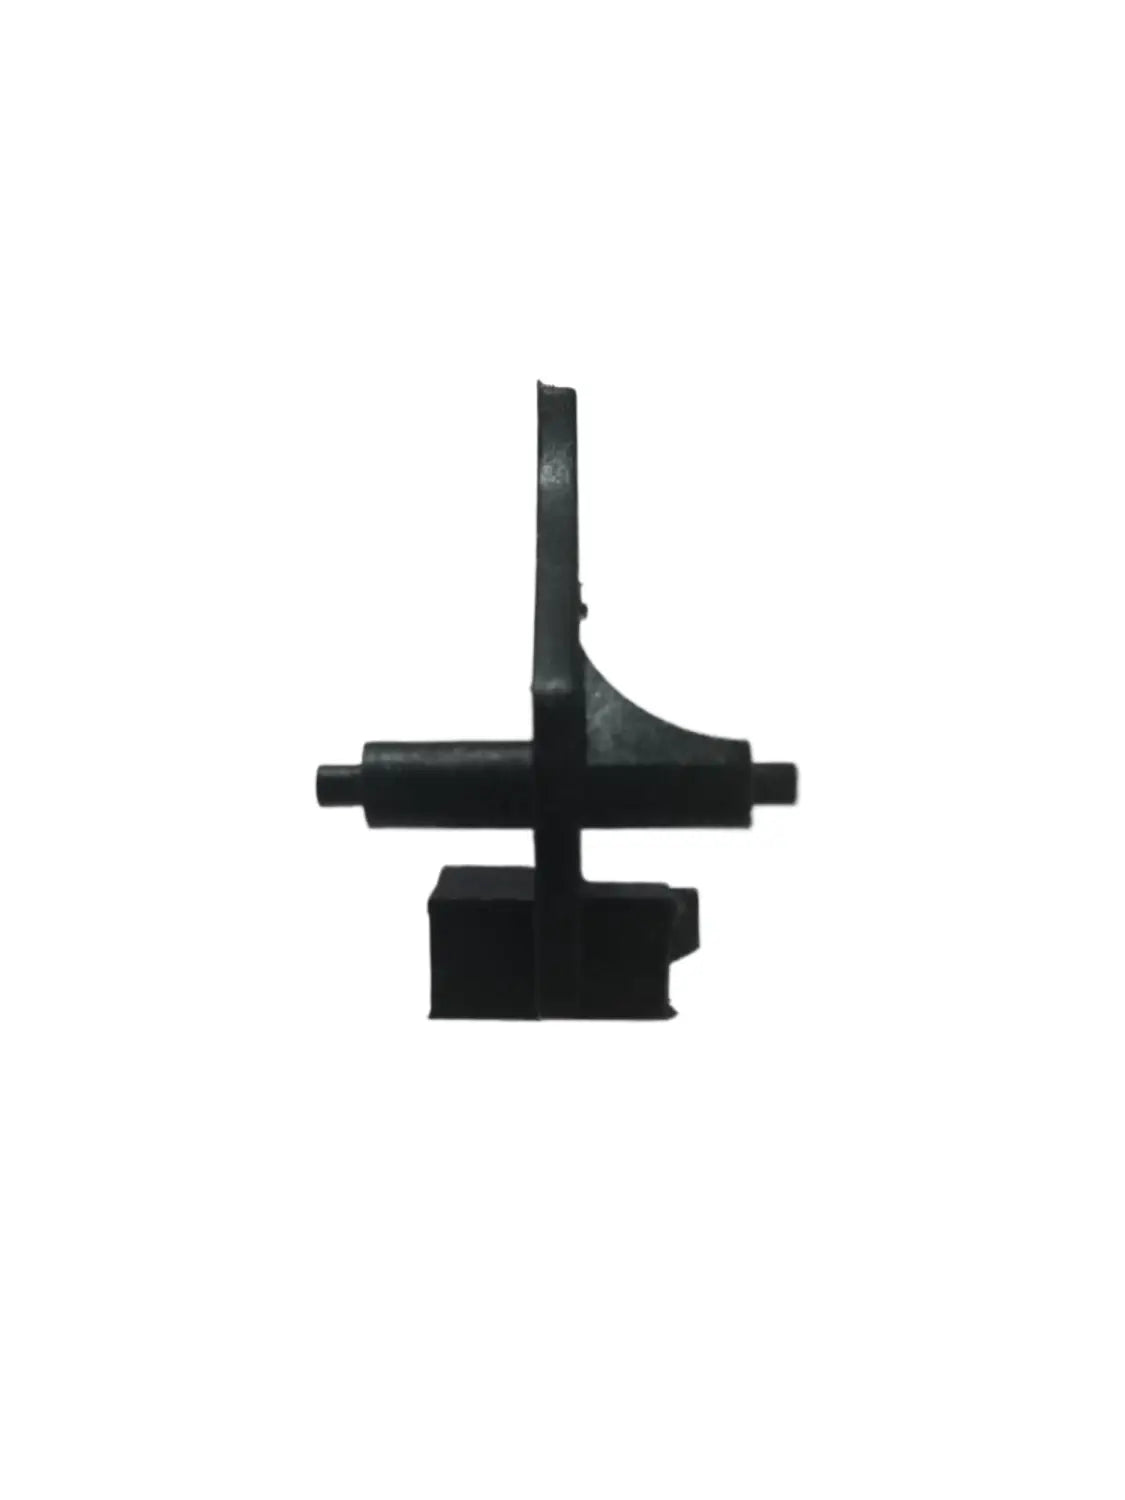
When the WC5855 fixing lever malfunctions, a replacement may be necessary to restore your Xerox WorkCentre 5855 printer to optimal functioning. This section provides a detailed guide on how to replace the fixing lever. Replacing this lever is crucial for ensuring the correct pressure is applied within the fuser, allowing the toner to properly adhere to the paper and preventing common issues such as smudging or paper jams. This repair requires a few tools and careful attention to detail, but with these instructions, you can perform this maintenance task effectively. The WC5855 fixing lever is often interchangeable with levers from other Xerox WorkCentre 5800 series models, such as the WC5845, WC5865 and WC5875, but you should always verify the part is compatible prior to starting the replacement process.
Before you begin to replace the WC5855 fixing lever, gather all the necessary tools to make the process smooth and efficient. Typically, you will need a Phillips head screwdriver to remove the screws securing the fuser assembly and the fixing lever. A flathead screwdriver may also be useful for gently prying components apart. Having a pair of needle-nose pliers can assist in manipulating small parts or removing any broken pieces of the old lever. Ensure you have a clean, static-free workspace to prevent damage to the fuser components. Additionally, having a small container to hold the screws will prevent them from getting lost. Remember to wear gloves to protect your hands and avoid transferring oils to the fuser or other parts of the printer spare. These tools will fix many of the common issues related to fusers.
To begin, turn off and unplug the Xerox printer. Carefully remove the fuser unit from the printer following the printer’s fuser assembly manual or documentation. Place the fuser on a clean, well-lit surface. Start by removing the outer cover of the fuser to expose the internal components. The process of replacing the WC5855 fixing lever involves:
| Step | Description |
|---|---|
| Removal | Locate the WC5855 fixing lever and inspect how it is secured. Use the appropriate screwdriver to remove any screws holding the fixing lever in place. Once the screws are removed, gently slide the old fixing lever out of its position, noting its orientation for easy reassembly. |
| Installation | Take the new WC5855 fixing lever and slide it into the same position as the old one, ensuring it is properly aligned. Secure the new fixing lever with the screws you removed earlier. |
Reassemble the fuser and re-install the fuser back into the copier. Do not forget to reset the fuser counter after you complete this replacement. The lever is essential in the release of the roller.
Once you have completed the replacement of the WC5855 fixing lever, it is important to dispose of the old fuser components properly. Fuser units and their associated parts, including the fixing lever, may contain materials that are harmful to the environment. Check with your local waste management services for guidelines on disposing of electronic waste or printer components. There are a few options to consider for responsible disposal:
This helps to minimize environmental impact and promote sustainable practices. This replacement makes the toner properly adhere.
After performing any maintenance or replacement on the fuser assembly, such as replacing the WC5855 fixing lever, it is crucial to reset the fuser counter. The fuser counter tracks the number of pages processed by the fuser unit. Resetting this counter ensures that the printer accurately monitors the lifespan of the fuser and alerts you when it is time for maintenance or replacement. Forgetting to reset the fuser counter can lead to premature warnings or, conversely, operating the fuser beyond its recommended lifespan, potentially causing damage to the printer. This helps to maintain optimal printer performance and prevent unexpected downtime. Regular printer spare maintenance includes this step, keeping your Xerox WorkCentre 5855 series running smoothly. The lever is essential in preventing issues.
The instructions for resetting the fuser counter on your Xerox WorkCentre 5855 are found in the printer’s fuser assembly manual or documentation. Typically, this process involves accessing the printer's control panel and navigating to the maintenance or administration settings. From there, you should find an option to reset the fuser counter. The specific steps may vary slightly depending on the software version of your Xerox WorkCentre 5855. Follow the on-screen prompts carefully to ensure that the reset is performed correctly. Always refer to the user manual for the most accurate and up-to-date instructions. Resetting the counter is an important step after any fuser replacement to ensure the printer functions correctly and accurately tracks the fuser’s usage. This maintenance is helpful to fix issues.
Sometimes, you may encounter issues when attempting to reset the fuser counter on your Xerox WorkCentre. One common problem is the option to reset being grayed out or unavailable. This can occur if the printer does not recognize that a new fuser or fixing lever has been installed. Ensure that the WC5855 fixing lever or fuser unit is properly installed and securely connected. Another issue could be outdated firmware. Updating the printer's firmware to the latest version can sometimes resolve compatibility issues and allow you to reset the counter. If problems persist, consult the Xerox WorkCentre documentation or contact a Xerox service technician for assistance. Correcting these issues will ensure that the printer can properly track and manage the life cycle of the fuser assembly, helping avoid unexpected downtime and poor print quality. The xerox workcentre 5855 needs this maintenance to fix lever issues.

The fuser module is a critical assembly in Xerox printers, responsible for ensuring that toner properly adheres to the paper, resulting in high-quality, durable prints. Key components of the fuser include the heat roller, pressure roller, cleaning blades, and the thermal fuse and thermostat, which regulate temperature to prevent overheating. Another essential component is the fixing lever, like the WC5855 fixing lever, which helps to maintain the correct pressure between the rollers. Picker fingers also aid in paper separation, preventing jams. Understanding each component is vital for effective troubleshooting and maintenance, ensuring the longevity and optimal performance of your Xerox WorkCentre equipment. Regular inspections of these fuser modules can help identify potential issues before they escalate.
Rebuilding a fuser module, particularly for the Xerox WorkCentre 5855 series, involves a detailed process that requires careful attention to each step. First, power down the printer and allow the fuser to cool completely. Then, remove the fuser module from the printer following the printer’s fuser assembly guide. Disassemble the fuser by removing the outer cover and inspecting each component for wear or damage. Key steps are detailed below:
| Step | Description |
|---|---|
| Disassembly & Inspection | Remove the outer cover and inspect each component for wear or damage. |
| Replacement | Replace any worn parts, such as the heat roller, pressure roller, or WC5855 fixing lever. |
Clean all components thoroughly to remove toner and debris. Reassemble the fuser module, ensuring all parts are secure. Finally, reinstall the fuser into the printer and reset the fuser counter. Use these instructions to fix the fuser.
To extend the life of your fuser assembly and prevent common issues, regular maintenance is essential. Keep the fuser area clean by removing any paper scraps or toner buildup. Periodically inspect the heat roller and pressure roller for wear or damage. Ensure the WC5855 fixing lever is in good condition and properly applying the correct pressure. Replace the fuser unit according to the manufacturer's recommendations, typically after a certain number of pages printed. Using high-quality toner can also help reduce wear and tear on the fuser components. Following these maintenance tips will help keep your Xerox printer running smoothly and reduce the need for frequent repairs or replacements. Regularly use a printer spare to complete maintenance.